
Download the XBAND Client Onboarding Guide.
XBAND CLIENT ONBOARDING GUIDE
There are two methods of subscribing to our service. You may create an account and then order the service or you may order the service and create your account at the time of checkout. This guide will walk you through creating an account, ordering the service and checking out to complete the order.
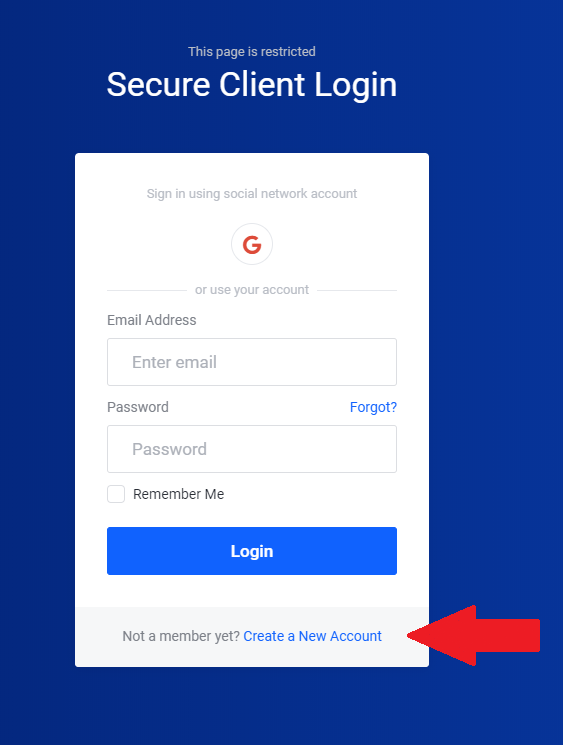
Please go to the main Xband Enterprises homepage and click on the log in link at the top right of the page. Home page: https://www.xbandenterprises.com. Figure 1.
LOG IN or REGISTER
|
If you do not have an account on the XBAND ENTERPRISES system, please click “Create a New Account” under the “Login” Button. Alternatively, if you have a “Gmail” account you may also use this method to create and sign-on to your account. Please verify your email address to avoid any future interruption of service. |
FIGURE 1. |
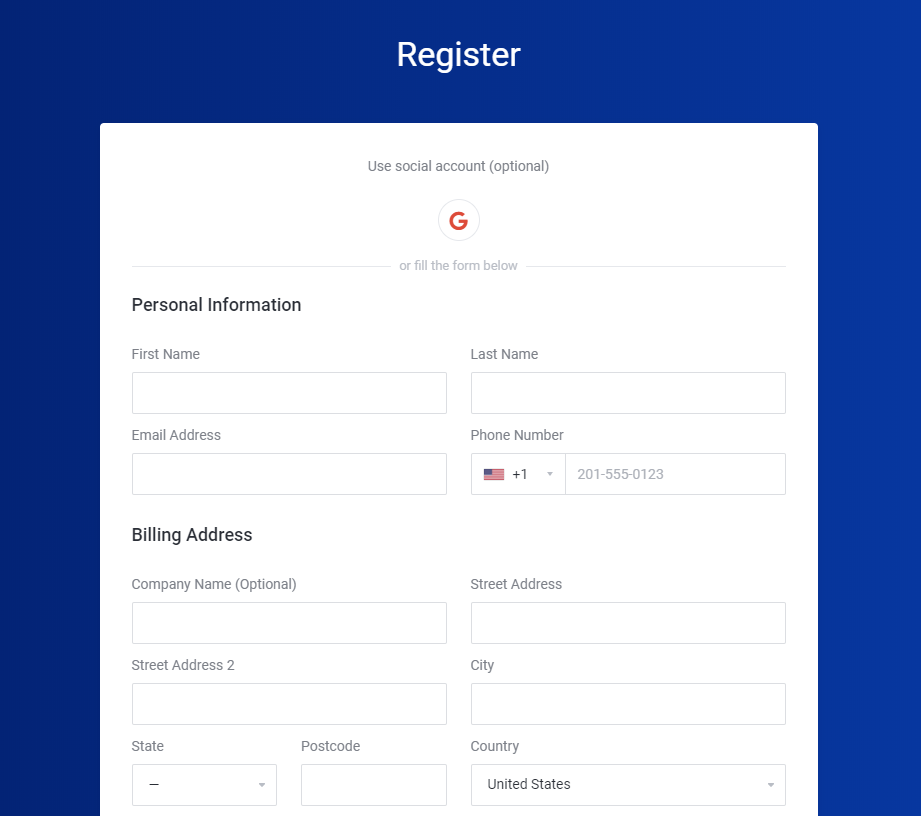
REGISTRATION
|
FIGURE 2. |
NOTE: XBAND does not respond to email requests which have not been validated in the system. |
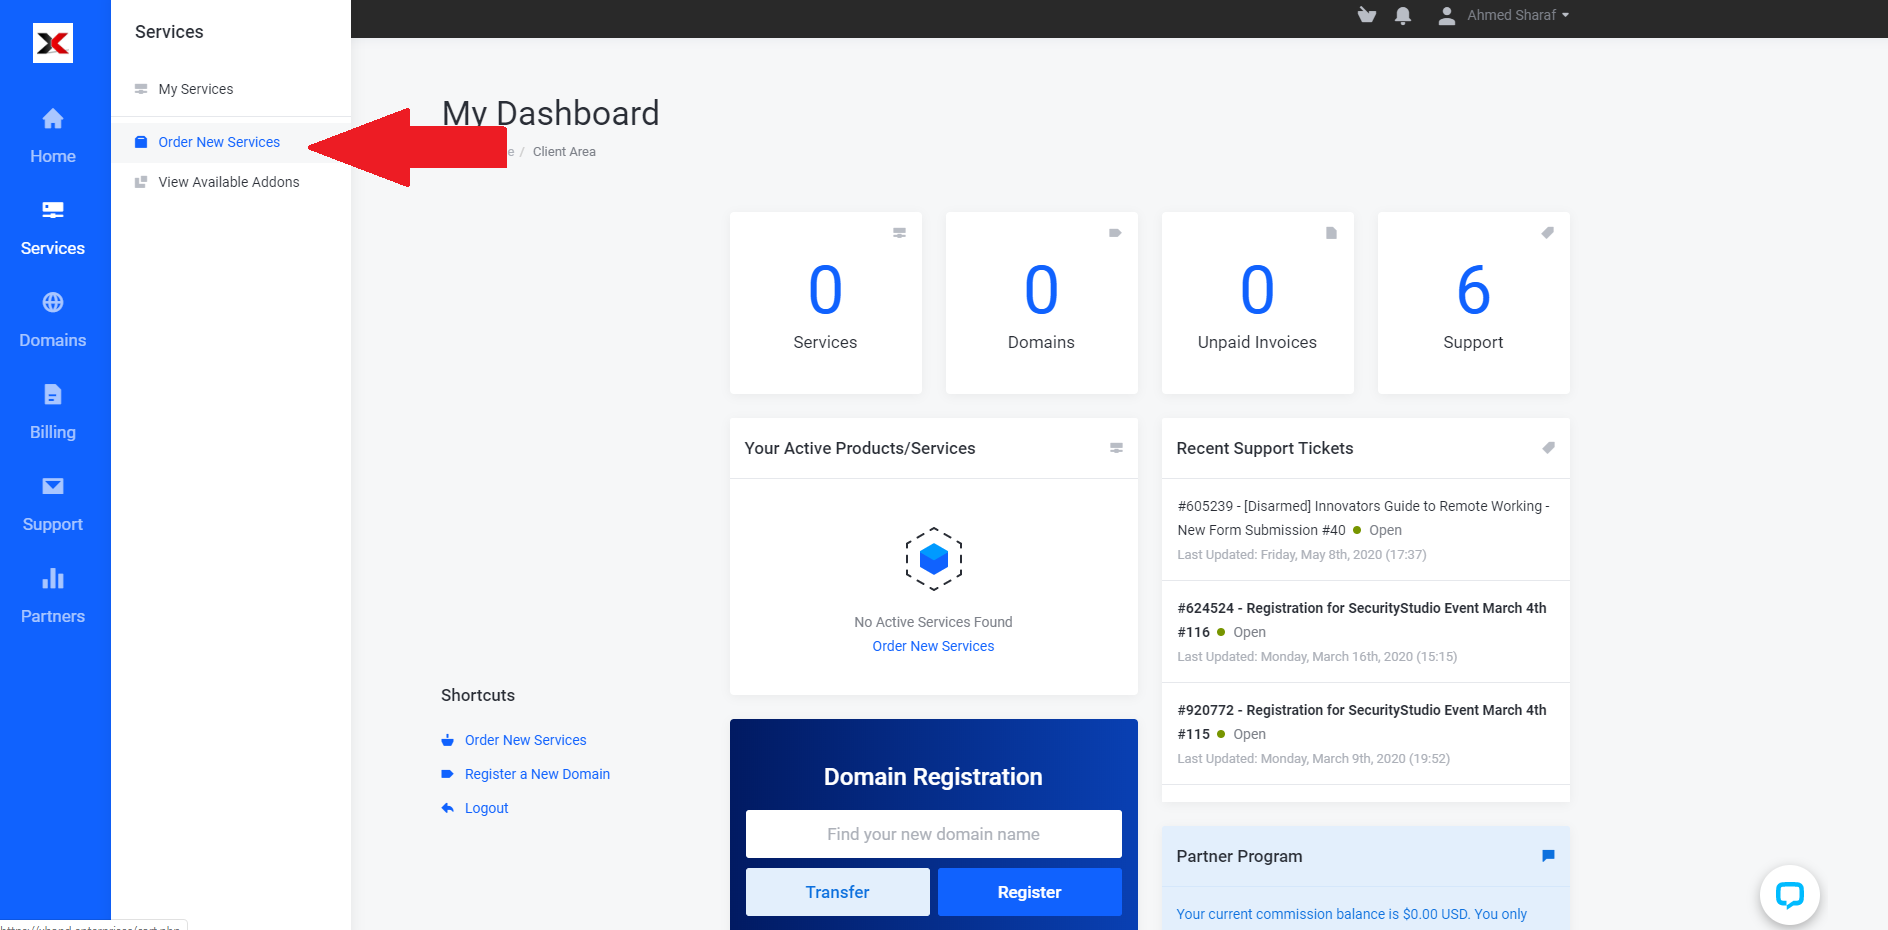
Once your account has been validated, you may log into the Client Area and Order New Services, Open a Ticket or Pay an Invoice.
| There are many advanced features of the Dashboard which will help your business manage and govern the relationship with XBAND. Note: “Your Info” and “Contacts” associated with your account will be listed appropriately. |
FIGURE 3. |

|
FIGURE 4. |
On the left-hand side, hover or “Services” and click on “Order New Services”. |
|
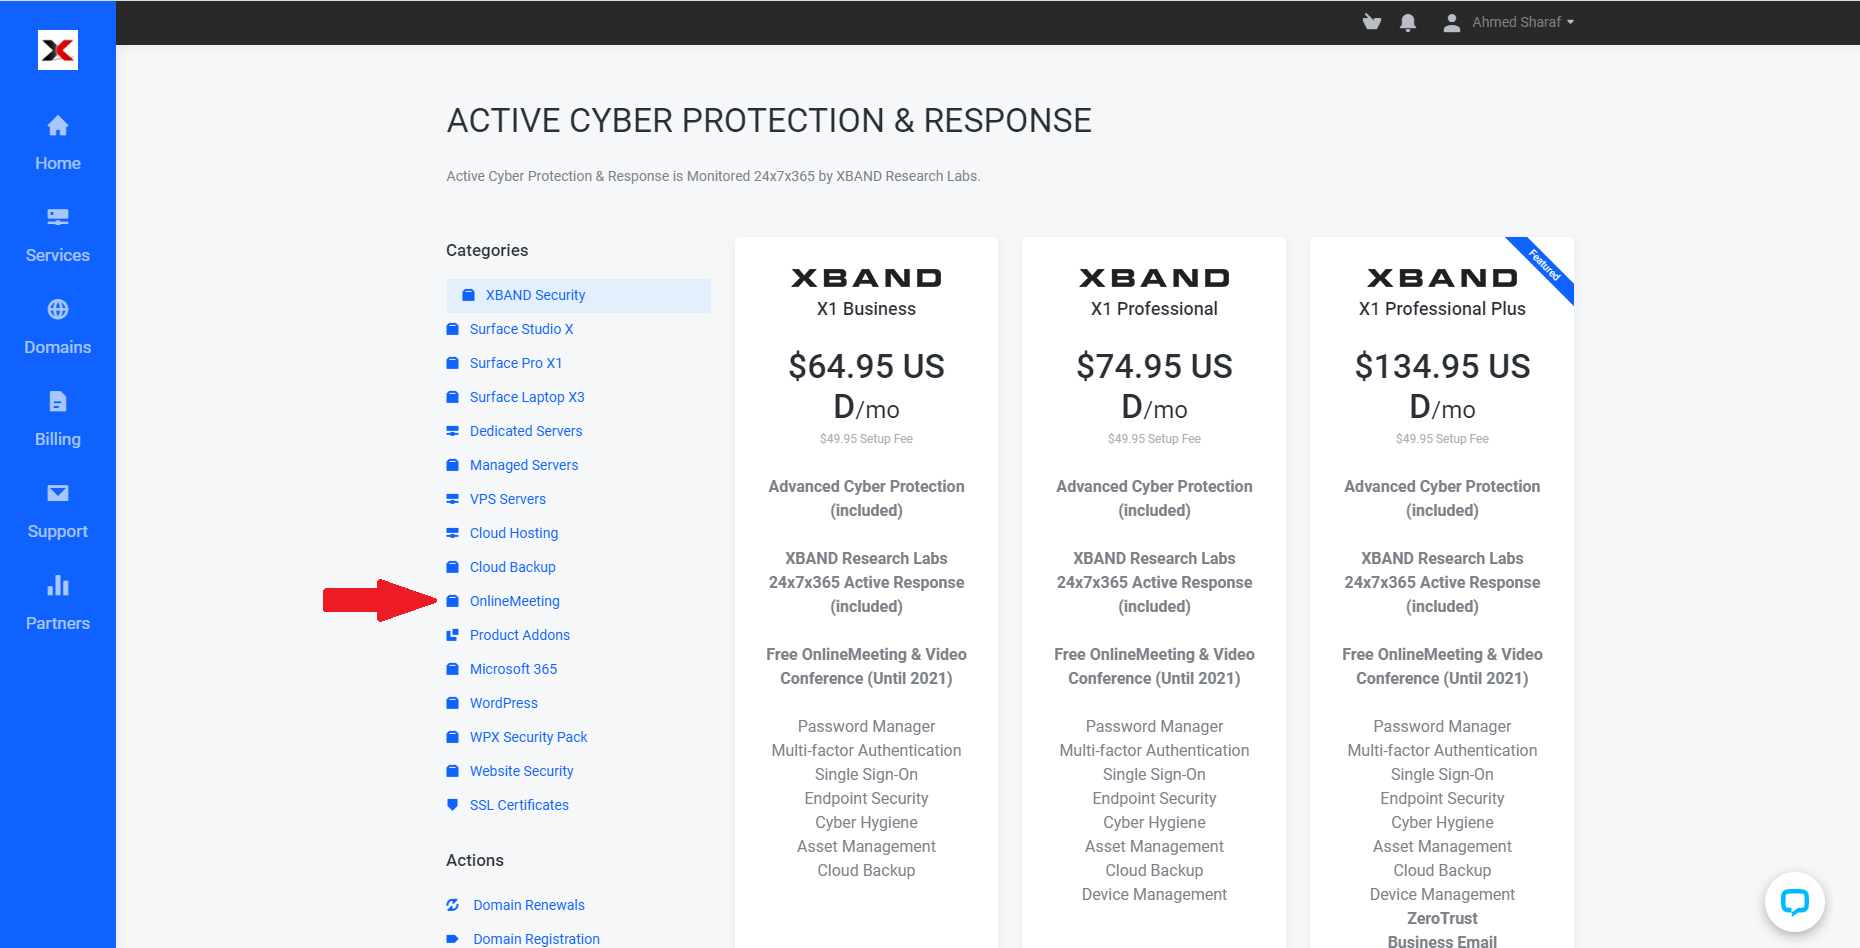
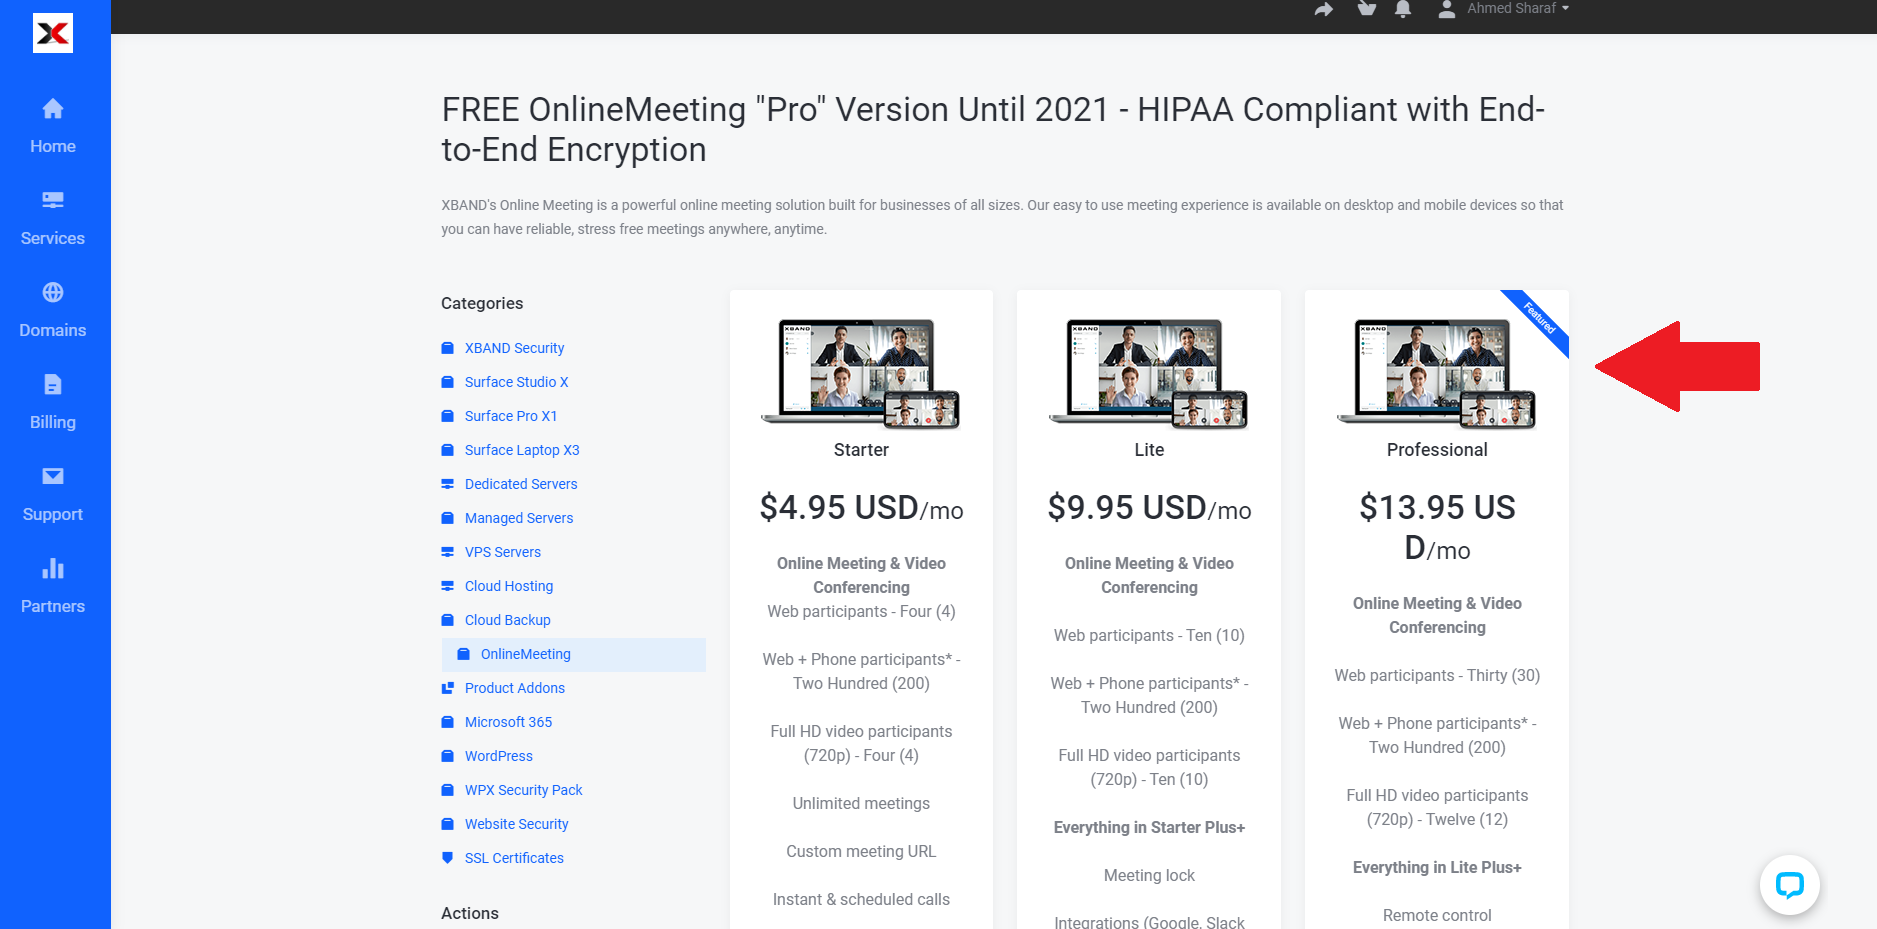
On the service menu, click on “Online Meeting”. |
FIGURE 5. |
|
FIGURE 6. |
Select the “Online Meeting “Professional” Edition. |
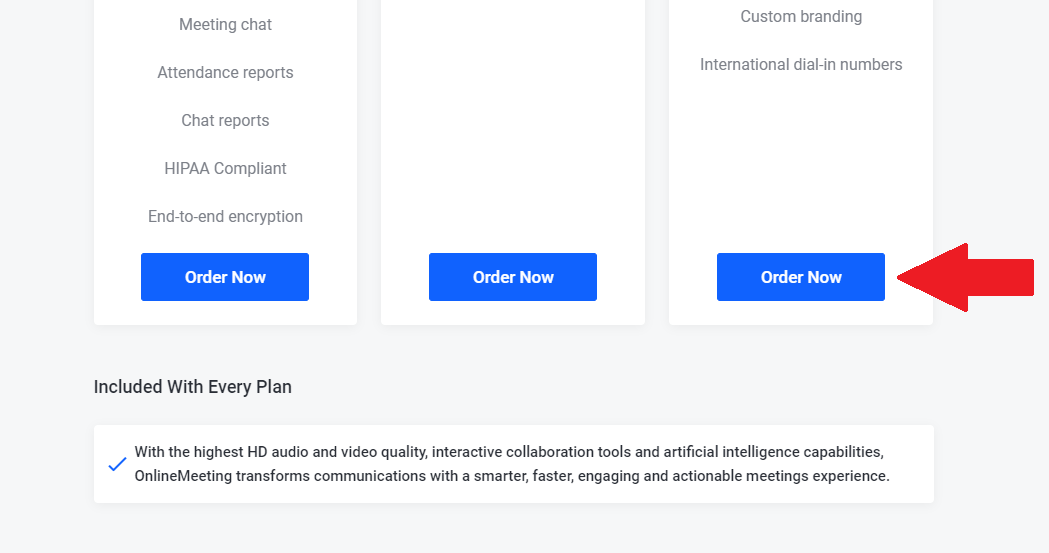
| Click “Order Now” at the bottom of the page to add the service to the cart. |
FIGURE 7. |
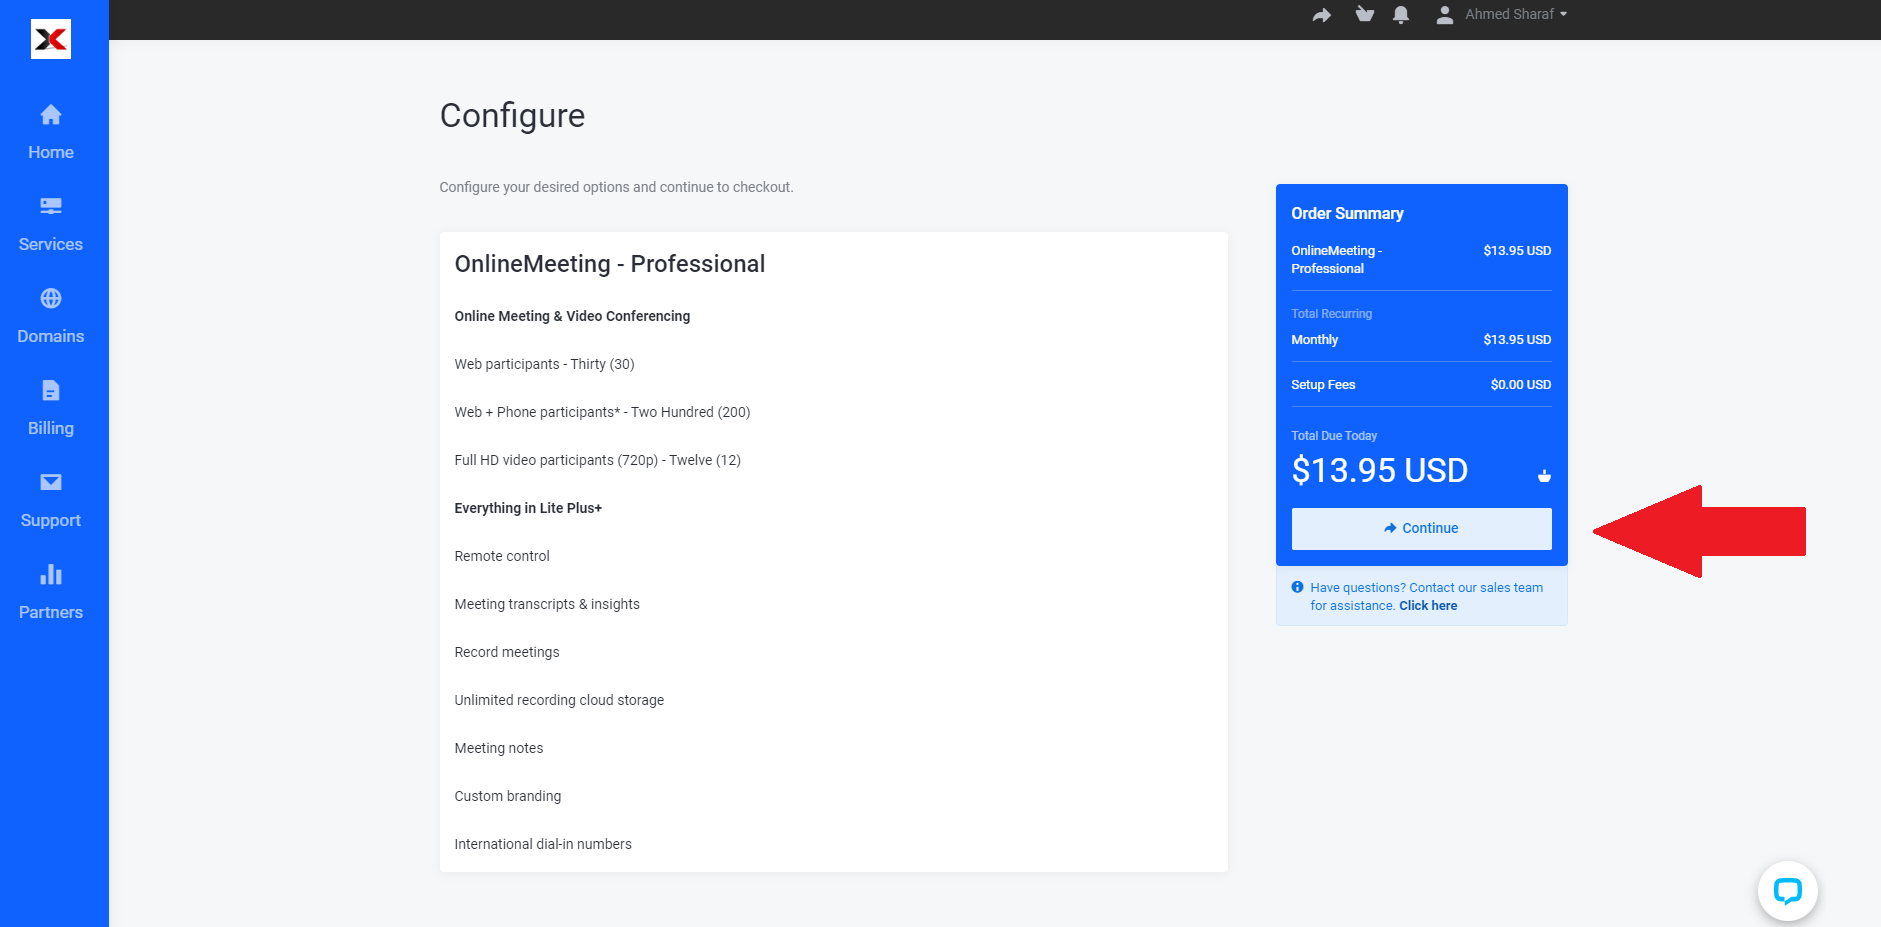
REVIEW THE ORDER
|
FIGURE 8. |
This will provide you with the opportunity to review the service description and configure any additional features. Click “Continue” to proceed. |
|
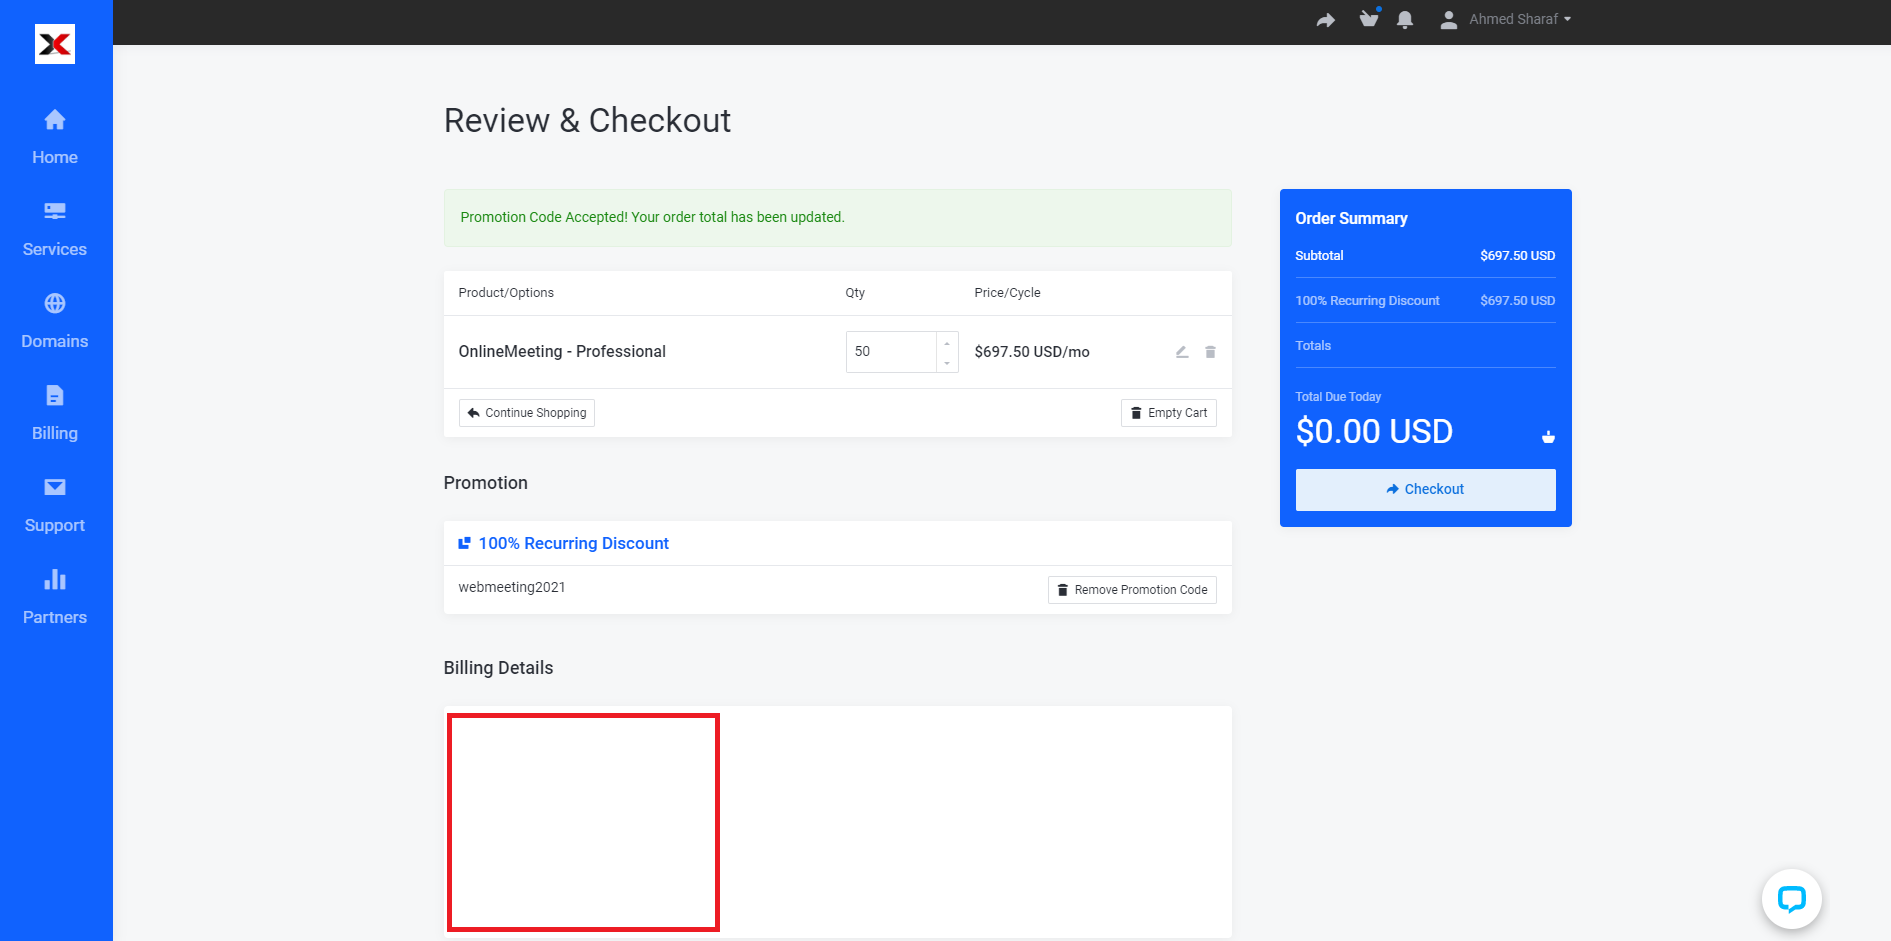
On the proceeding screen, you may select additional accounts by using the up and down arrows or entering the desired number of accounts. Afterwards, please click “update”. This will update the number of accounts in the cart. Subsequently, you may add any associated “Promotion Codes” and click “Validate Code”. |
FIGURE 9. |
|
FIGURE 10. |
In this instance, please use: WEBMEETING2021 Please validate the “Billing Address and Payment Method” and review and select the “Terms of Service” option box. Terms of Service: https://www.xbandenterprises.com/terms-of-use/ Click “Checkout” to complete the order. |
|
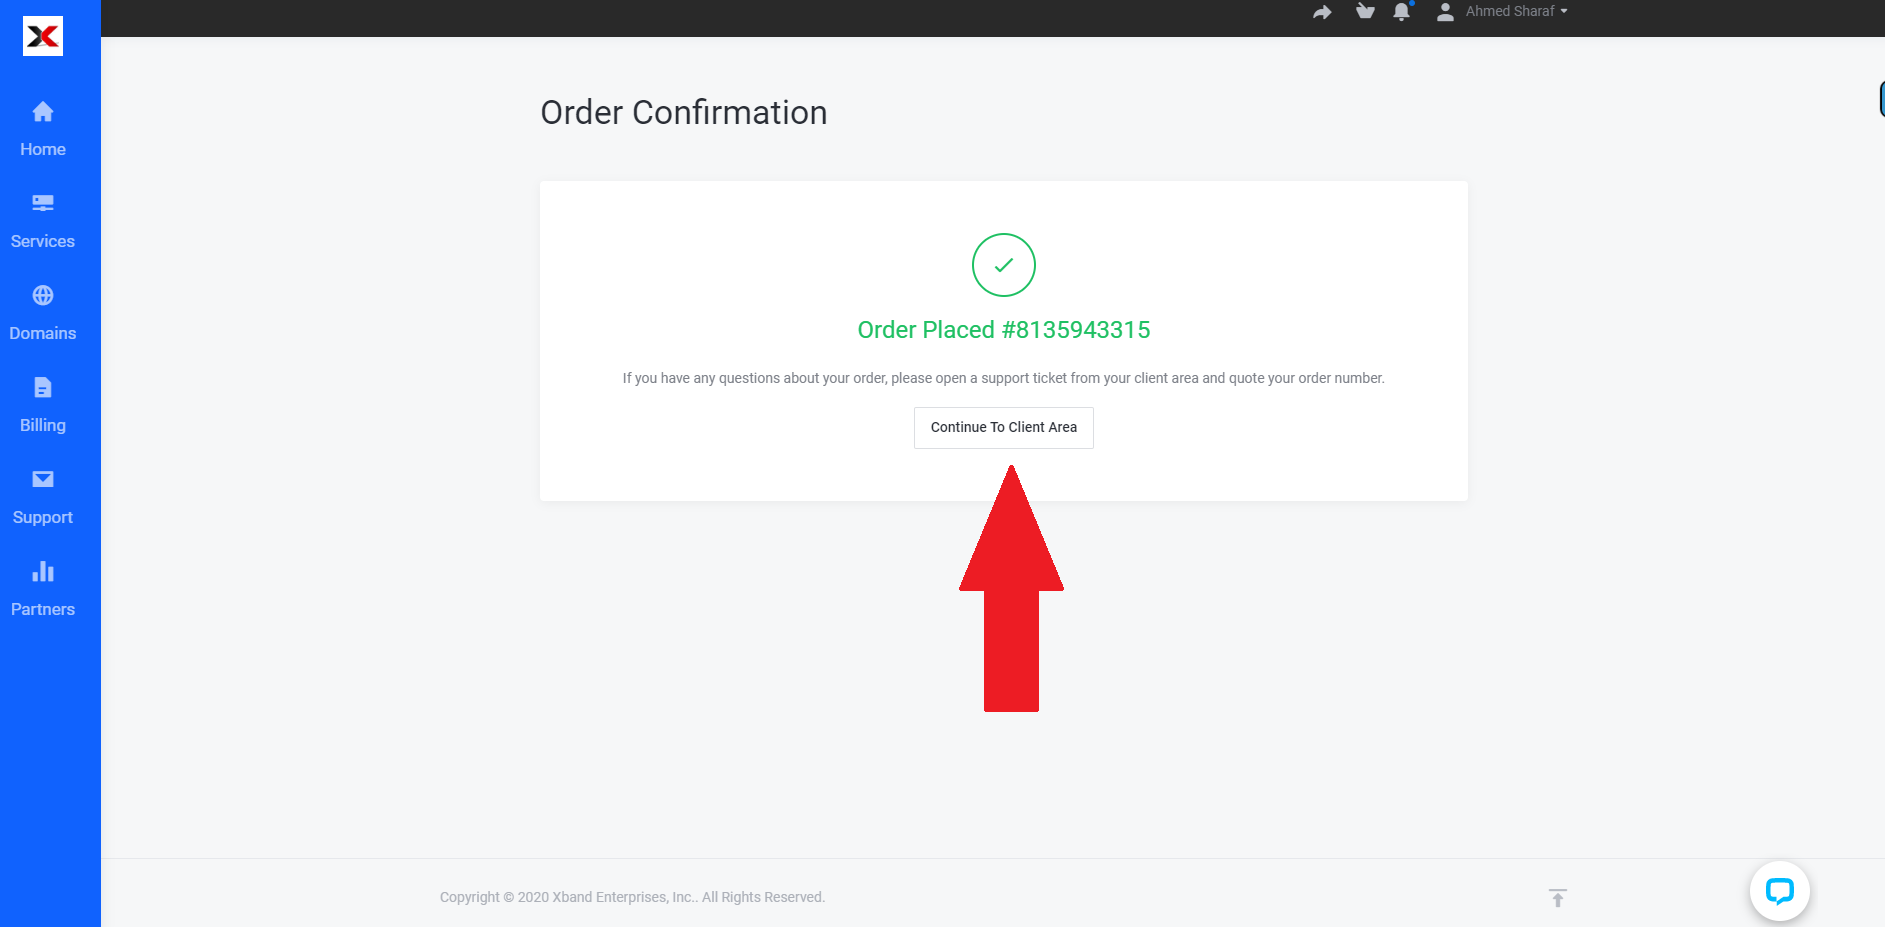
Your order is complete. If you ordered multiple accounts, please open a ticket and provide the additional account information. Otherwise, an XBAND representative will contact you for additional details or guidance. |
Order Submitted |

Additional Resources:
Knowledgebase: https://exchange.datacenter.xyz/KB/Article/38863
Desktop App: https://exchange.datacenter.xyz/KB/Article/38968
Android App: https://play.google.com/store/apps/details?id=net.serverdata.newmeeting
iOS App: https://apps.apple.com/us/app/online-meeting/id1494540201
Download the XBAND Client Onboarding Guide.
